
The ImageFuser screen is divided in a "top half" viewing area and a "bottom half" command area. The left pane is a table that will show thumbnails of your source images with the path to the image. The right pane (now showing ImageFuser) is the preview pane. It will be populated with a preview image as soon as you have added your source images.
The bottom half contains the tabs where you can change the settings that influence the end result. Every change will immediately be reflected in the preview.
 The first step to create a well balanced exposed picture with great detail starts with a set of photographs with different exposure. This is called (exposure) bracketing. Most modern camera's support "auto bracketing". You make a photo in "auto bracketing" mode and your camera will take (in general) three photos: a 0EV standard exposure image, a -1EV underexposed image and a +1EV overexposed image. Almost all camera's have a manual setting to compensate from -2EV (or -3EV) to +2EV (or +3EV) and sometimes more. These manual settings are preferred over the standard "auto" mode which is mostly limited to -1/+1 EV. To improve your image, "more is usually better". This means that you can better take the maximum exposure correction values: a -2EV, 0EV and +2EV photo.
If your camera supports higher values, you might use: -3, -1.33, 0, +1.33, +3 (EV) to get a bracketed series of 5 photos (or -4, -2, 0, 2, 4 EV).
The first step to create a well balanced exposed picture with great detail starts with a set of photographs with different exposure. This is called (exposure) bracketing. Most modern camera's support "auto bracketing". You make a photo in "auto bracketing" mode and your camera will take (in general) three photos: a 0EV standard exposure image, a -1EV underexposed image and a +1EV overexposed image. Almost all camera's have a manual setting to compensate from -2EV (or -3EV) to +2EV (or +3EV) and sometimes more. These manual settings are preferred over the standard "auto" mode which is mostly limited to -1/+1 EV. To improve your image, "more is usually better". This means that you can better take the maximum exposure correction values: a -2EV, 0EV and +2EV photo.
If your camera supports higher values, you might use: -3, -1.33, 0, +1.33, +3 (EV) to get a bracketed series of 5 photos (or -4, -2, 0, 2, 4 EV).
If possible use a tripod and find a steady subject. Trees or leaves moving in the wind are a very difficult subject.
 You have three options to open/add photos to ImageFuser.
2.4 Step 3: Decide on output format
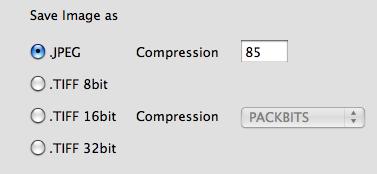 The output format of your image is automatically determined by the input format. If you add jpeg images, the output will default to jpeg. If you add 16bit tiff images, the output will default to 16bit tiff.
This output option and compression ratio/type can be freely selected off course.
The output format of your image is automatically determined by the input format. If you add jpeg images, the output will default to jpeg. If you add 16bit tiff images, the output will default to 16bit tiff.
This output option and compression ratio/type can be freely selected off course.

Note: You don't need to specify enfuse settings. In 95% of the cases the default settings will give good results. Each slider has a text field below it. The slider value and the text value are coupled. The sliders are especially useful when making "big steps" towards the optimum, the text fields help you fine-tune towards the final settings. I will not explain all possibilities and their meaning here as you can find them on http://wiki.panotools.org/Enfuse. The little help button in the top right of the Enfuse tab will directly open this webpage.
 In the main tab of ImageFuser you have the checkbox "Use Align_image_stack". You use this option if your images are not correctly aligned "on top of each other". If you did not use a tripod or if your tripod was a bit shaky, you will always have a little offset between the images. The builtin Align_image_stack program will align your images correctly based on equal points in the source images. This is a time consuming step but gives in general very good results.

Note: your tweaked align_image_stack options are only taken into account if you have set the "Use Align_image_stack" checkbox. I will not explain all possibilities and their meaning here as you can find them on http://wiki.panotools.org/Align_image_stack. The little help button in the top right of the Align_image_stack tab will directly open this webpage.
 If you are ready you simply click the "Create enfused image" button and wait for the result. Once your image has been created it will automatically be displayed in the MacOSX program Preview.
Another option is via the menu: "File -> Save enfused image".
If you are ready you simply click the "Create enfused image" button and wait for the result. Once your image has been created it will automatically be displayed in the MacOSX program Preview.
Another option is via the menu: "File -> Save enfused image".
 Simply click the "Create HDR image" button to create a HDR image.
You can also do this from the menu: "File -> save HDR".
Simply click the "Create HDR image" button to create a HDR image.
You can also do this from the menu: "File -> save HDR".